Wood wax oil painting solid wood furniture sampleTechnology
Today, we will use wood wax oil as the object of practical testing, and use the wooden boards painted with PU paint as a reference, and then compare the effects of two sample white blanks with wood wax oil to see the painting effect After the final comparison between the wood wax oil sample and the reference plate, you will know the magic of wood wax oil.
1
Material preparation:
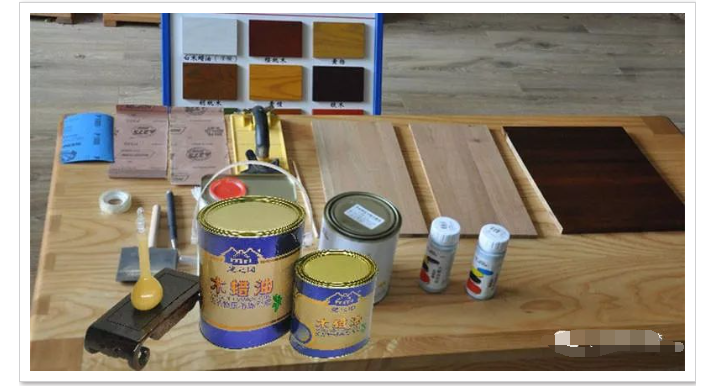
Reference plate (dark brown on the right painted with PU paint) and white sample.
Wood wax oil (choose genuine wood wax oil products), special diluent, and color paste (can be selected according to the color of the reference board).
Special sponge brush, can opening equipment, small straw, and gloves.
Sandpaper (generally 180#-320#, 600#-1000#), sandboard, lint-free cotton cloth, pen, debugging color paste cup, chopsticks.

2
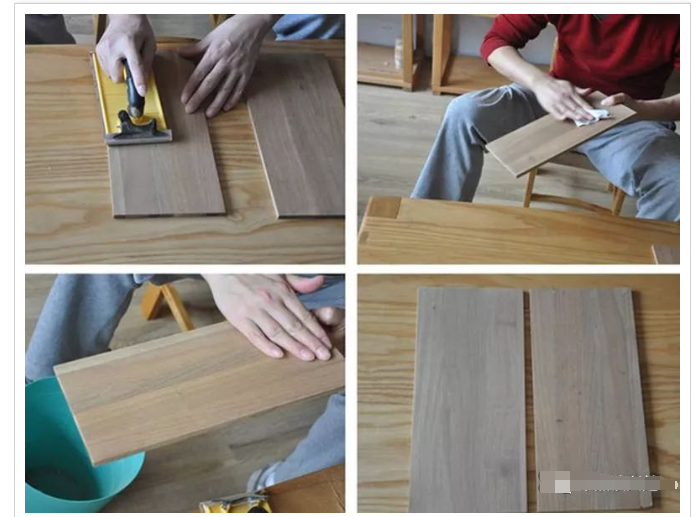
Polishing the white blank sample
Experts often say that “30% depends on painting, and 70% depends on polishing.” Therefore, before painting, the step of polishing is crucial. The surface of the sample blank must be polished until the surface is smooth. If the surface is not polished smooth enough, it will cause the surface to be rough and uneven after painting, and even affect the uneven overall tone. Therefore, grinding is very important. You can consider using 180# sandpaper to roughen the surface and then 1000# sandpaper to finely grind the surface. Then use cotton cloth to clean the surface sand powder and wood powder.

3
Sample comparison method
In order to better compare the effects, each sample needs to be divided into two parts. The best way is to use a ruler to measure the dividing line, and then use transparent tape to paste it as the dividing line (here The dividing lines are designed by us for the convenience of consumers to make comparisons. They have nothing to do with the construction tutorial. DIYers do not need to learn these steps).

4
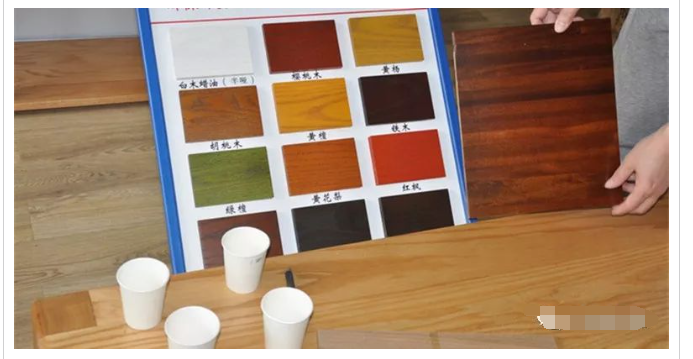
Color paste selection
The color paste can be selected based on the reference board painted with wood wax oil compared with the reference board painted with PU paint. In the comparison in the figure below, there are three standard color pastes that can be selected (walnut wood) , huanghuali, teak), and a three-tone harmonious color paste style is black, red maple, and rosewood, and the weight ratio is 1:3:6.
5
Blend wood wax oil with color paste (weight ratio 10:1)
Weigh the color paste. Therefore, the sample to be made here is a small-scale production, and the dosage needs to be accurately compared. Therefore, straw filling and accurate electronic scales are needed to strictly prepare the sample dosage. The reconciliation of proportions. The prepared color paste dosage needs to be stirred evenly before use. If used for a long time, precipitation will form and affect the uneven color coating.
6
The combination of color paste, wood wax and oil
Stir the mixed color paste evenly and then add wood wax oil and mix thoroughly. It should be noted here that the weight ratio of wood wax oil and color paste is 10:1,
7
First painting (rubbing method)
There are three coats of painting this time. The first two coats are purely coloring processes, and the last one is to use clear oil as a cover. Of course, you can also apply it twice, but the effect of three times will be better. And in order to ensure the wood wax oil painting effect, it must be applied with a thin brush.
Then, you need to use the kneading brushing method for the first coat. You need to pour the wood wax oil mixed with the color paste on the sample board and then use a lint-free cotton cloth to rub it clockwise. This can better make the wood The wax oil penetrates deep into the wood, forming a protective effect and better reflecting the texture of the wood itself. At the end of the rubbing process, you need to rub along the wood grain (the rub method needs to be used here)), and then place it in a well-ventilated place to air-dry, and then apply it again after 24 hours.
Look at the picture below. What is the effect after the first rubbing of the four color pastes on the two samples? Isn’t it great?
8
Second painting (brushing method)
After being left for one day, the sample is dry enough and can be painted for the second time. Before painting, use 1000# sandpaper to polish the surface until it is smooth and flat. Use a lint-free cotton cloth to clean the surface. Can be painted twice.
Remember, the dosage of wood wax oil and color paste selection for the second application are consistent with the ratio for the first application. When applying for the second time, you must use a sponge to brush thinly, paying attention to brushing thinly along the wood grain texture. After the second painting, the effect is actually enough to be reflected, and it is very close to the effect of the reference plate. Finally, place it in the same place with good ventilation and air-dry it for 24 hours, and then you can do the final finishing work.
9
Final painting (clear oil cover)
Before the third coat of painting, still polish the surface of the sample. Use 1000# sandpaper to finely grind the surface of the sample, and then use a lint-free cotton cloth to clean the surface.
After polishing and cleaning, use a special clean wood wax oil clear oil (no need to add color paste) for thin brushing. When brushing, use a sponge or a lint-free soft cotton cloth to finish. After working, place it in a well-ventilated environment and let it air dry for 24 hours to compare with the sample effect of PU paint.
The effect of wood wax oil is closest to the PU paint sample. Please carefully observe whether the texture of the wood is obvious. Although there is transparent tape in the middle, the link between the textures can still be clearly seen. This is the magic of wood wax oil. It completely highlights the natural ornamental value of wood without destroying the beautiful texture of the wood itself. After reading the above wood wax oil construction process, do you think it is not enough? It doesn’t matter, please follow us, there will be more knowledge and benefits about wood wax oil in the future.